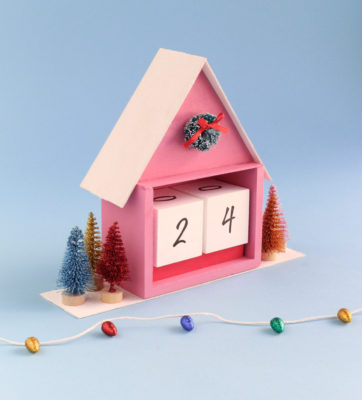
DIY Wooden Block Christmas Countdown
Supplies:
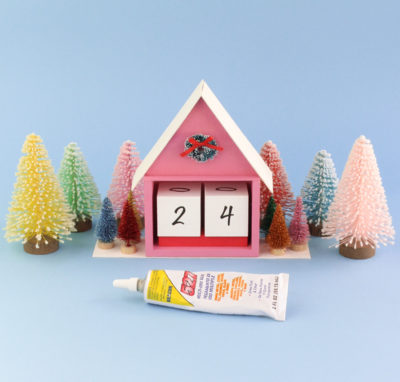
Beacon Adhesives 527
Unfinished Wood Block Calendar
Thin Balsa Wood
Pencil + Ruler
Small Craft Knife
Glitter + Fake Snow
Pink, White and Red Paint + Paintbrush
Number Stickers
Small Wreath + Trees
Instructions:
- Measure and trace the balsa wood so that it is the same width as your block calendar but extends 2 inches from each side. Elle’s piece was about 8 1/4″ tall and 2″ wide. Use your craft knife very carefully to cut this piece out. Note: When cutting thin pieces of balsa wood, I found that using the tip of the craft knife to create incisions along the cutting line works best.
- On your balsa wood, sketch two triangles that are as long as the base of your block calendar – the tip of the triangle should be at the middle point. Then, sketch two rectangles which will be the roof pieces of your calendar and measure them so that they are the same as your calendar but extend past the edges a bit. Elle’s pieces were about 4.5″ tall and 2″ wide. Using your craft knife, carefully cut these pieces out using the same method mentioned in step 1.
- Paint your pieces – you only have to paint one side of each piece. For the pieces that are white, Elle sprinkled on some fake snow and glitter while the paint was still wet so that it stuck. Note: You will notice your pieces will start to curl because the wood is so thin. After you paint your pieces and they are dry, place them under a stack of books or something similar so that they flatten out again completely.
- Paint the block calendar base pink and the squares white. Then, add number stickers to your blocks following this pattern:
Block 1: Top should have a 0 and bottom should have a 5 – all around the sides there should be a 1, 2, 3 and 4.
Block 2: Top should have a 0 and bottom should have an 8 – all around the sides there should be a 1, 2, 6 and 7. - Using your 527, glue a small wreath onto the middle of one of the triangles you painted pink.
- Use your 527 to glue your block calendar base pieces together. Elle wanted a little bit more support on top of my calendar so she cut a piece of balsa wood that was the same size as the block calendar and glued it on top. Then, she painted it pink to match the rest of the piece.
- Take your triangle with the wreath and glue it on top of the block calendar base like pictured above. Elle left a little bit of space in front her piece so that it wasn’t smack dab in the front. When gluing this piece, hold the triangle where you want it to be and add plenty of glue along the back line (this will all be covered by the roof). Hold it in place until you feel it has formed a strong enough grip. Repeat these steps with the other triangle so that it is on the backside of your calendar.
- Add 527 along the top edges of your triangles and attach your roof pieces to them very carefully. Hold them in place until you feel they have formed a strong bond.
- Glue small trees along the sides of your now small house and then assemble all of the remaining pieces together!
Now you’re all set to countdown to Christmas!
Follow us on social media:
Instagram | Facebook | YouTube | Pinterest
This DIY was designed and handmade by Elle Bee.