DIY Glitter Fruit Ornaments
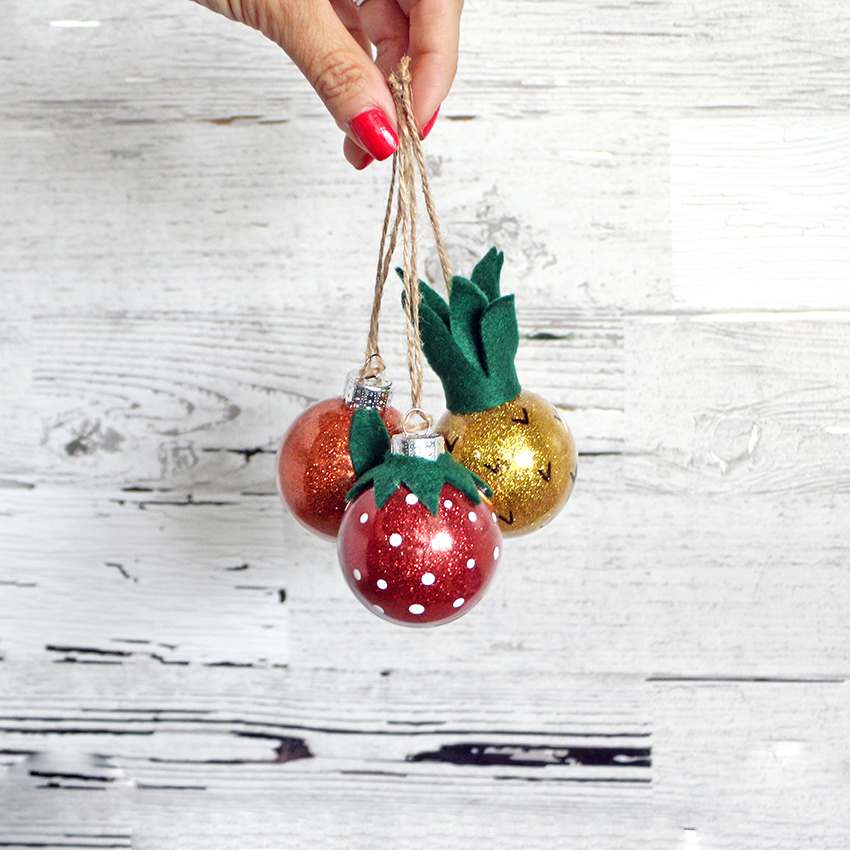
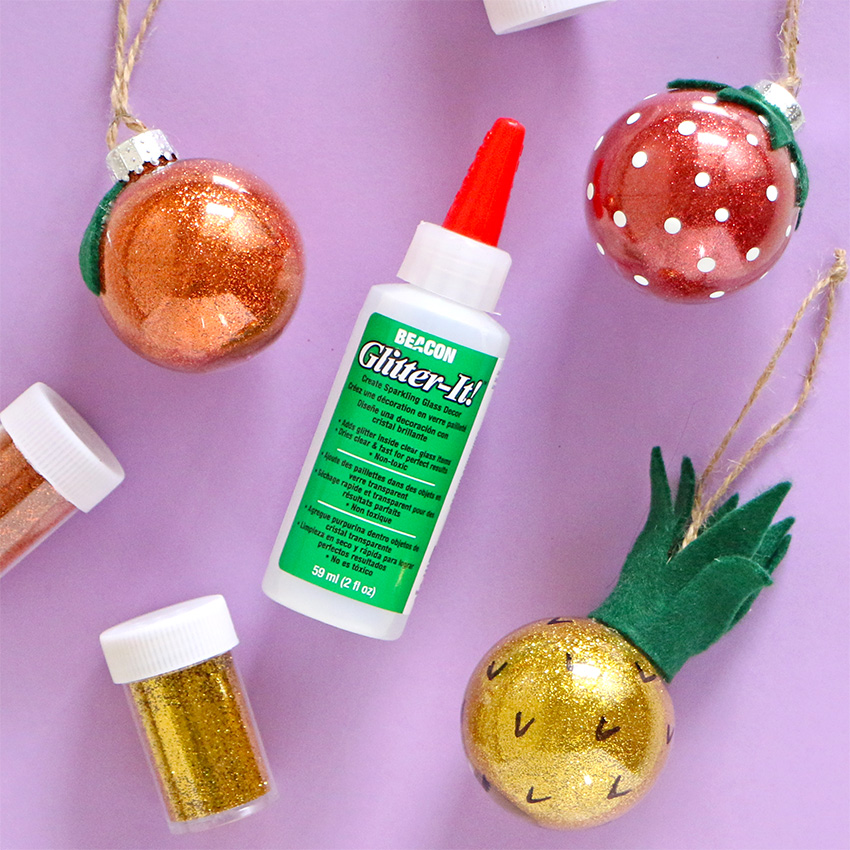
Learn how to make super easy DIY Glitter Fruit Ornaments – the cutest ornaments in the history of ornament making! If you’re looking for more of a non-traditional route for your ornaments, this is the tutorial for you. With Beacon Adhesives Glitter-It!, any glitter ornament is possible. Glitter-It! is the perfect adhesive to add shimmer and shine to any glass or plastic object, which is why it’s perfect for all of your ornament decorating needs. The glue dries fast and clear, without dulling the glitter and has a pointed end so you can easily apply it with precision. Glitter-It! is the perfect product to make all kinds of beautiful decorations for the holidays and festive occasions. Now let’s talk fruits. Which is your favorite? Which would you want to recreate into an ornament? Pick your fav and follow along below!
Supplies:
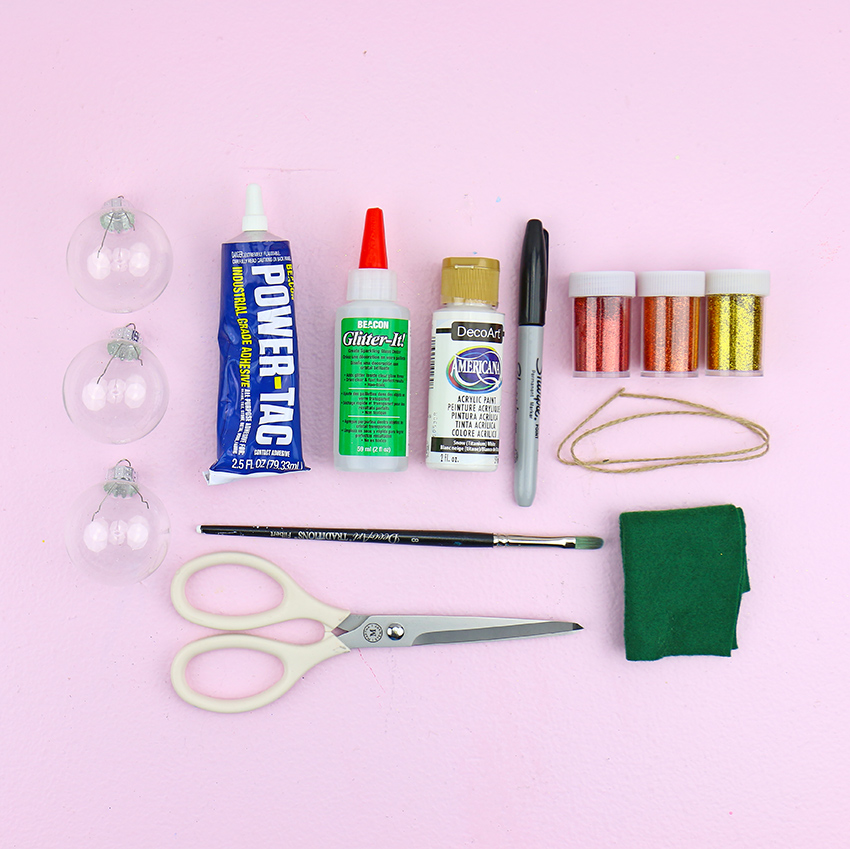
Beacon Adhesives Glitter-It!
Beacon Power-Tac
Glitter (Yellow, Orange and Red)
Green Felt
Scissors
Scrap Piece of Paper (To make a funnel)
White Acrylic Paint
Paint Brush
Twine
Ruler
Black Sharpie
1 TBL. White Vinegar and 1 c. Warm Water (For cleaning)
Paper Plate
Instructions:
Step 1: Before you get started, you’ll need to clean the inside of the ornaments. To clean, add one tablespoon of white vinegar to one cup of warm water and pour a small amount into the ornament. Swirl it around to thoroughly clean the glass and then empty the ornament and rinse well with warm water. Finally, turn your ornament upside on a plate to dry.
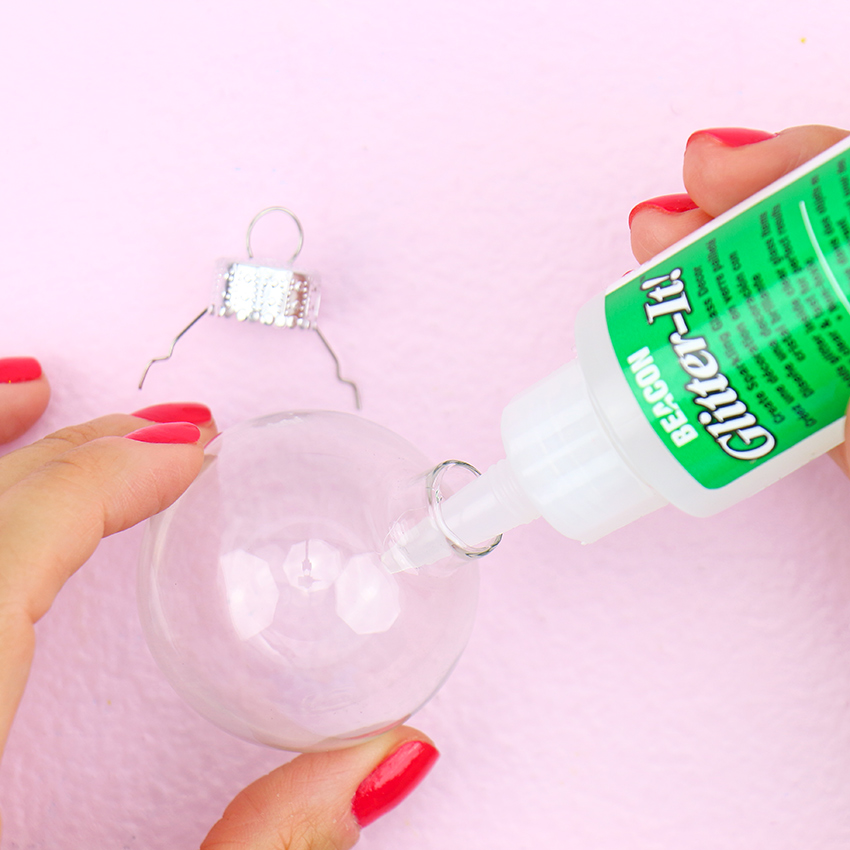
Step 2: Once the ornament is dry, add a small amount of Glitter-It! into the inside and swirl it around to coat the entire inner surface (add more if needed).
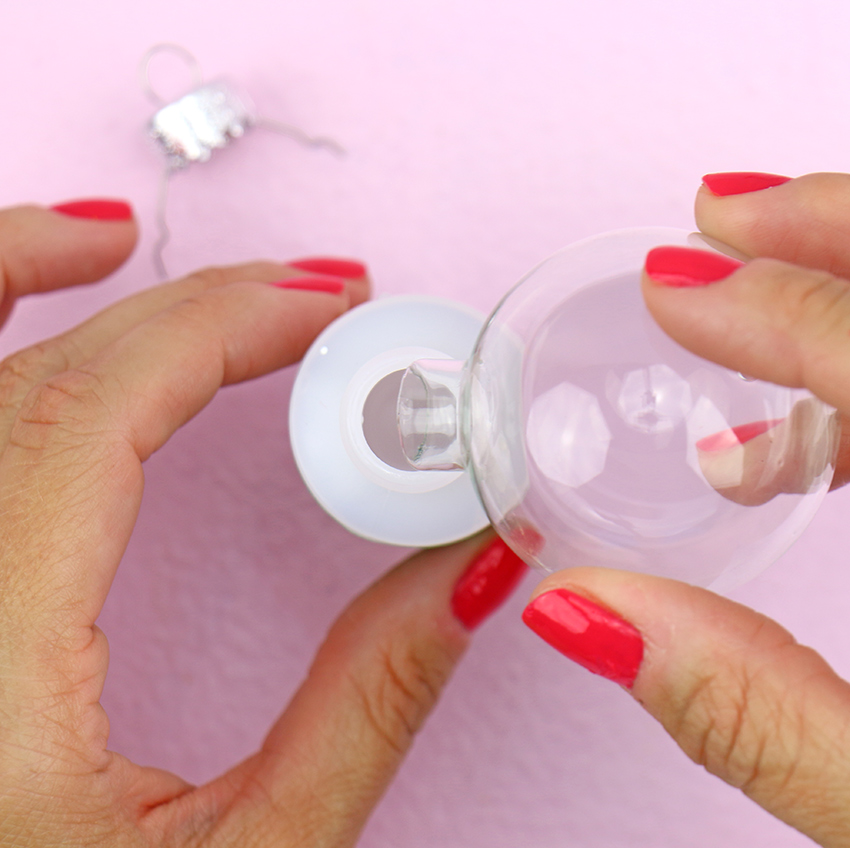
Step 3: Then, slowly pour the excess adhesive back into the bottle spinning the ornament to cover the top with adhesive.
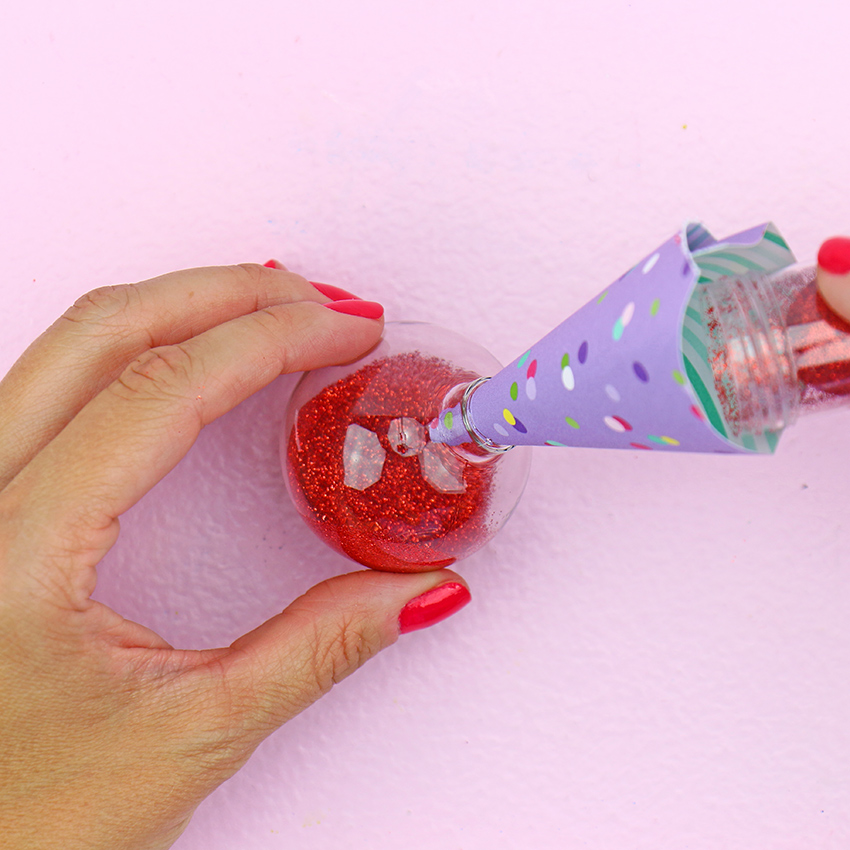
Step 4: Immediately add about 1 teaspoon of fine glitter to the inside. Use a piece of paper to create a funnel if your opening is too small.
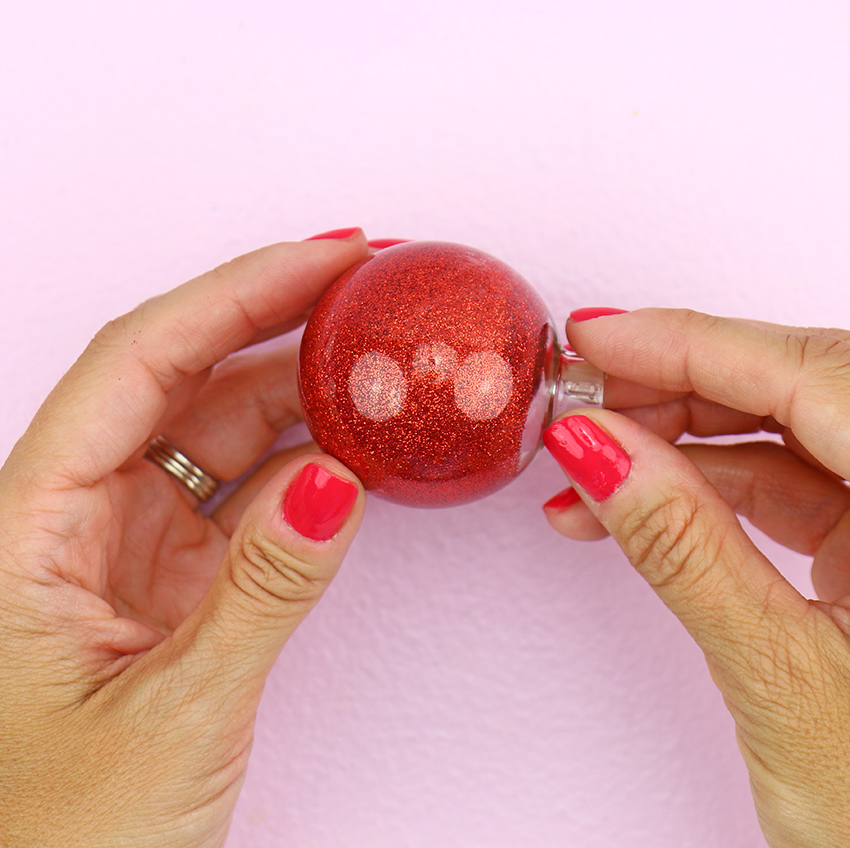
Step 5: Rotate and shake the ornament until the inside of the ornament is completely covered with glitter. Then, turn the ornament upside down and shake away any excess glitter. Let it dry for about 10 minutes and replace the ornament hanger. Repeat the above steps to add yellow and orange glitter to the other 2 ornaments.
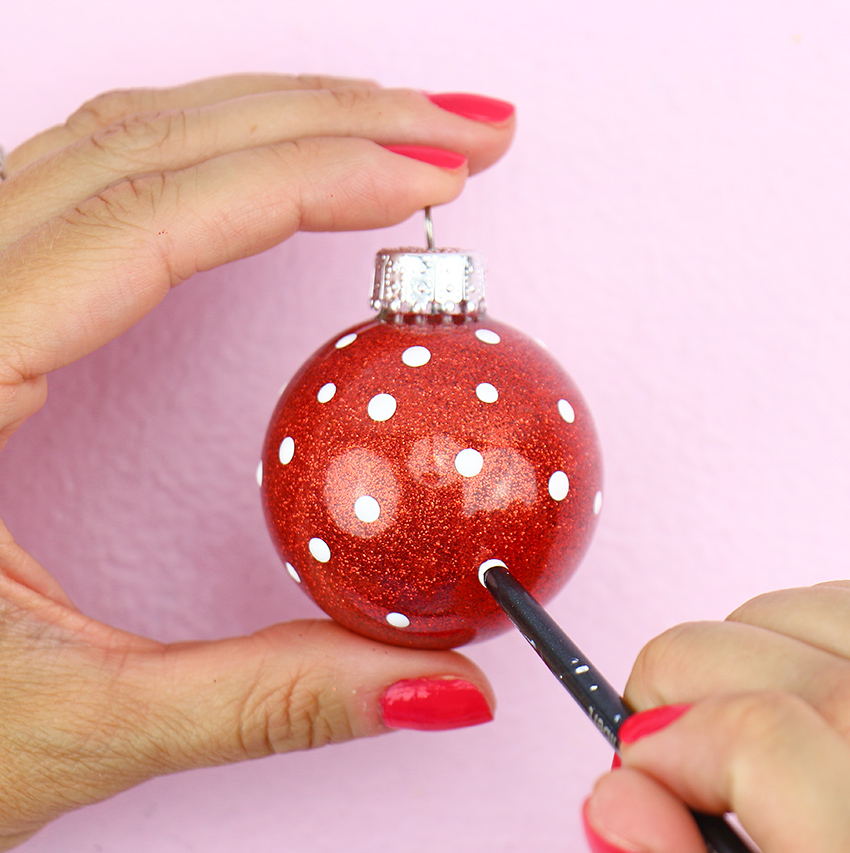
Step 6: Next, dip the end of a paint brush into white paint. Then, make dots all over the ornament to create the look of seeds.
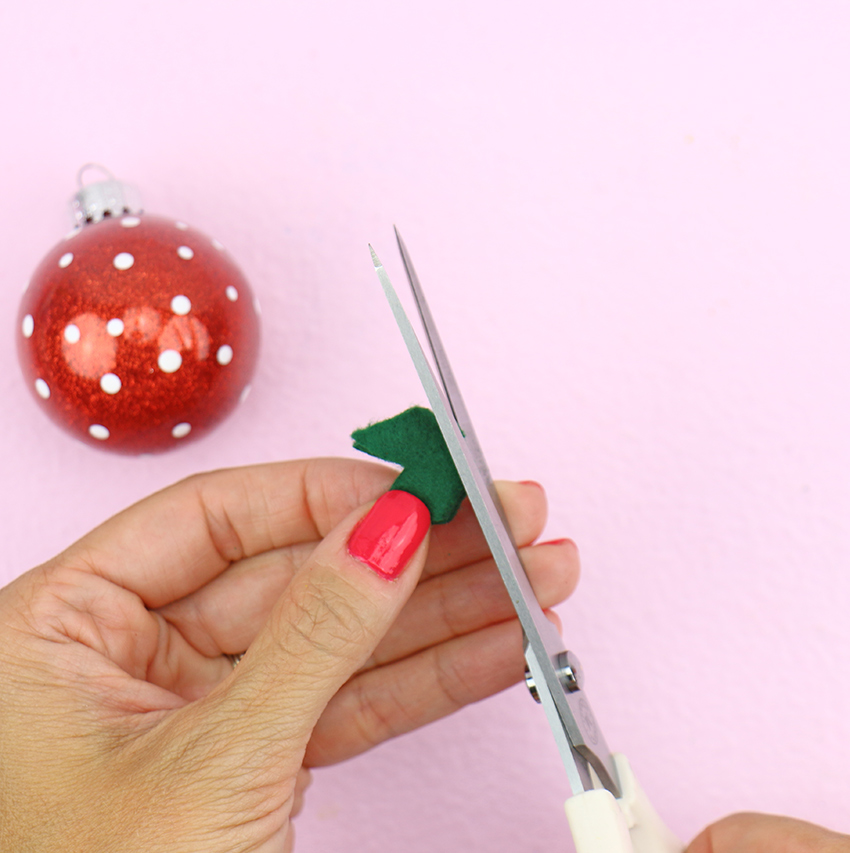
Step 7: To make the strawberry stem, cut out a green felt circle measuring 55mm. Fold it in half, and then in half again. Snip off the point. Then, cut two triangles in the other end.
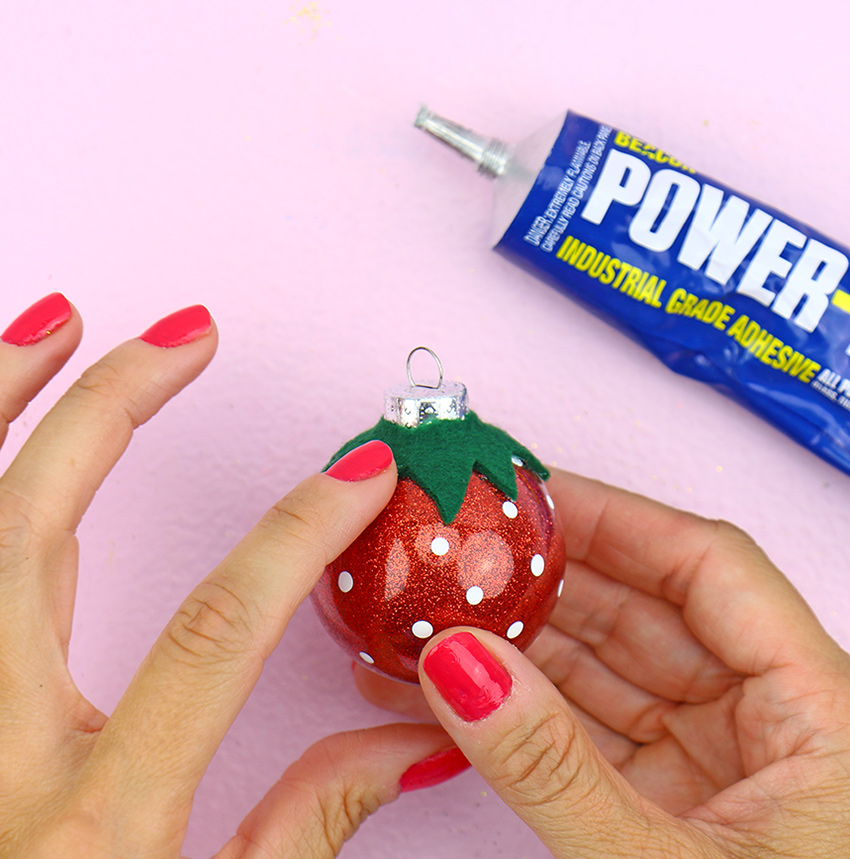
Step 8: Pull the stem over the top of the ornament and use Power-Tac to glue down the leaves.
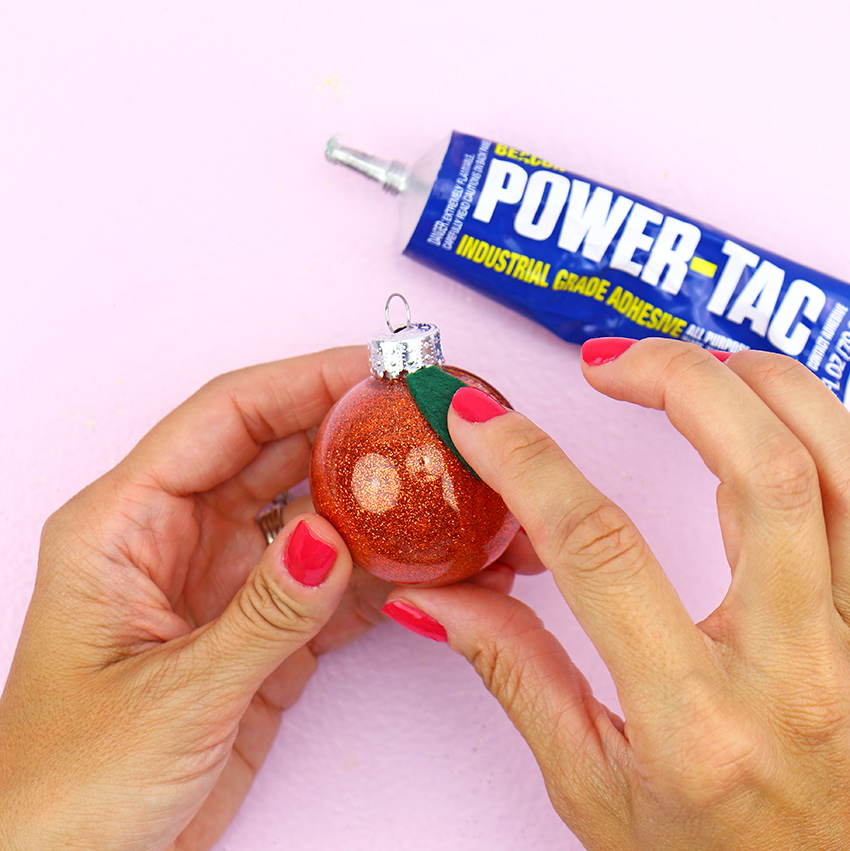
Step 9: For the orange, cut a small leaf out of the green felt. Then, use Power-Tac to glue it to the top of the ornament.
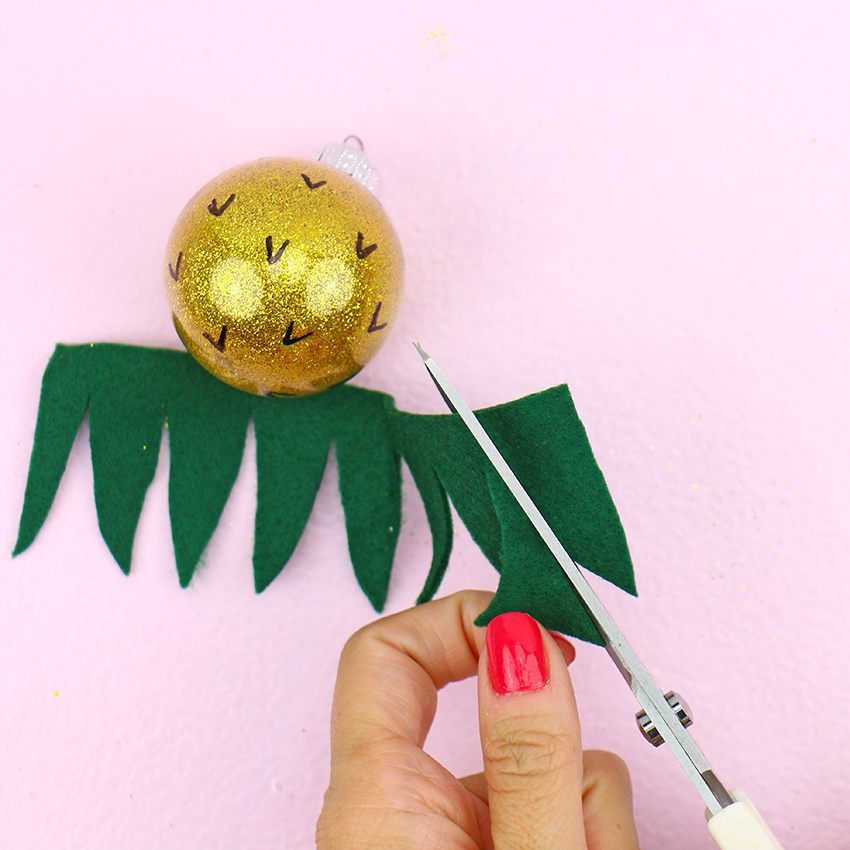
Step 10: To make the pineapple leaves, cut a strip of felt 5.25” long and 1.5” tall. Then, cut in leaves, stopping about a .25” from the bottom.
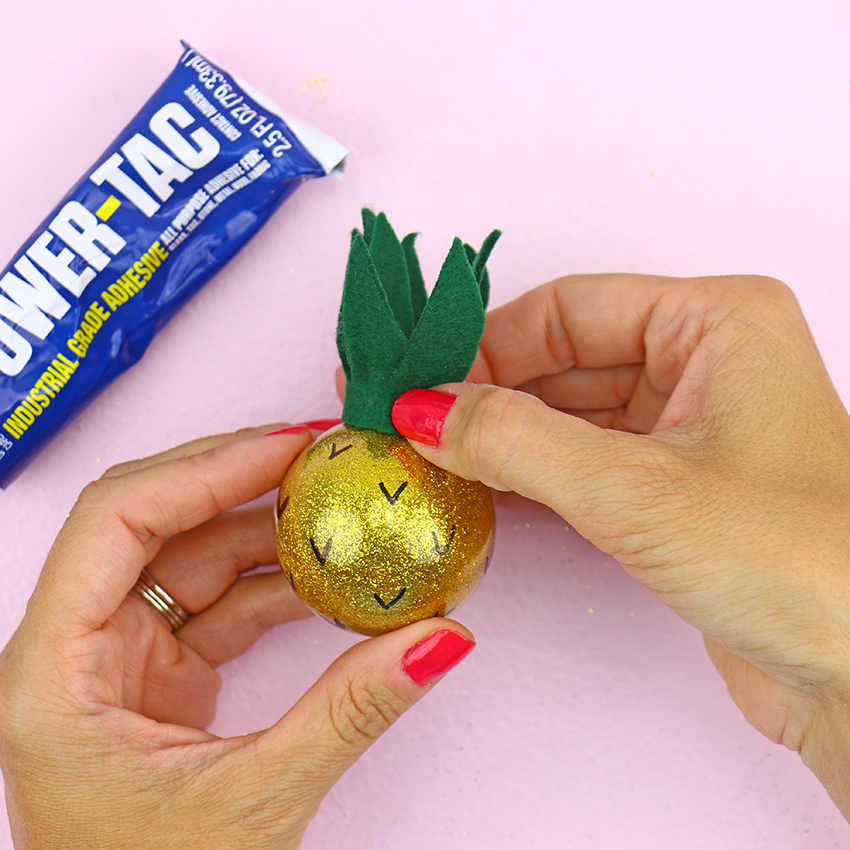
Step 11: Add a dab of Power-Tac to the metal ornament holder and add the felt stem. Wrap the remaining felt around, adding glue to the end of the felt to secure it.
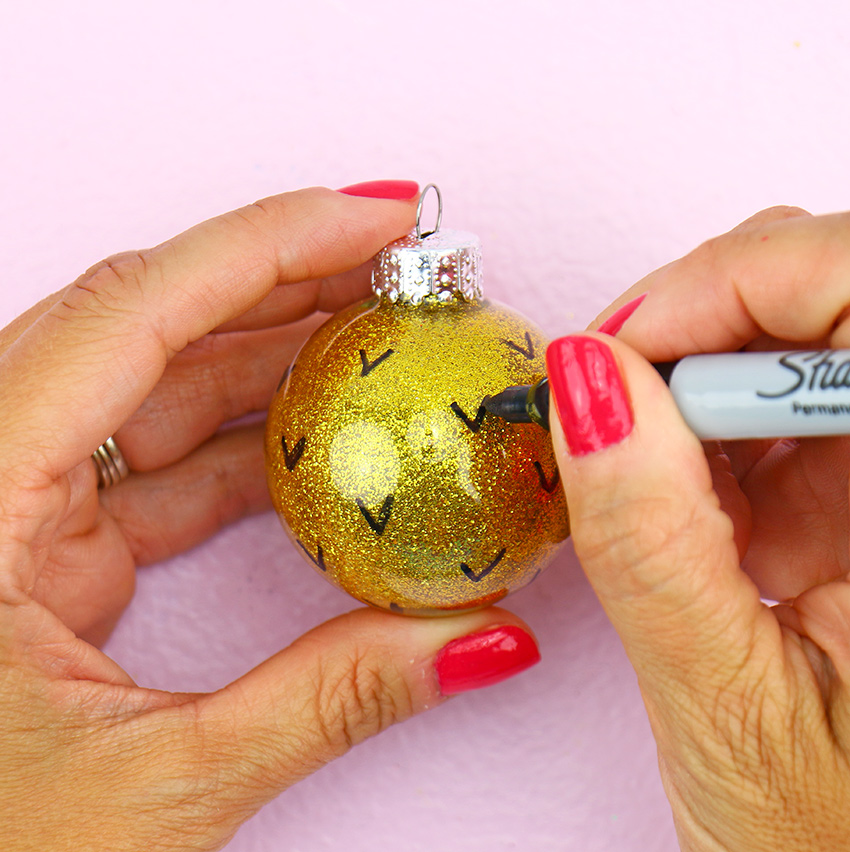
Step 12: Use a Sharpie to add V’s all over the ornament.
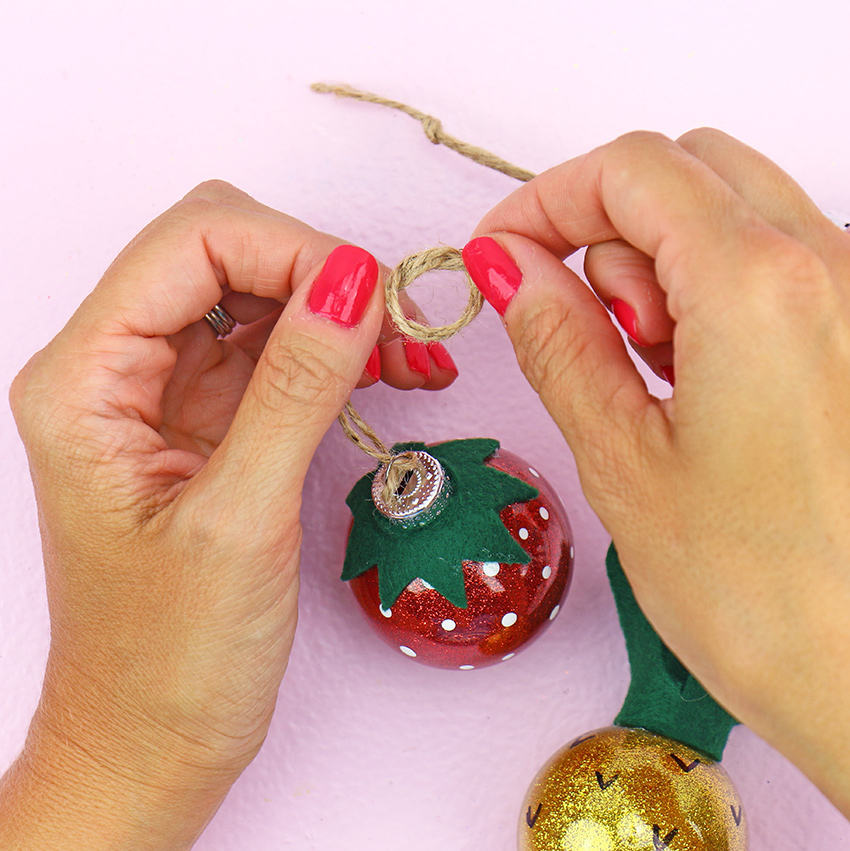
Step 13: Finally, cut a piece of twine 6” long, fold it in half, place the fold inside of the loop on the ornament, pull the strings on the other end through, and tie.
These are the perfect accessory for your tree this year! They also make for a great holiday gift. For more DIY inspiration, be sure to check us out on social and tag us in your projects for a chance to be featured!
Get 20% off ALL craft glues using code ORNAMENT20 at checkout. Offer valid until December 25th at 11:59 PM EST. Exclusions apply.
Follow us on social media:
Instagram | Facebook | YouTube | Pinterest
This DIY was designed and handmade by Meghan Quinones.