DIY Pearl Knotted Headband
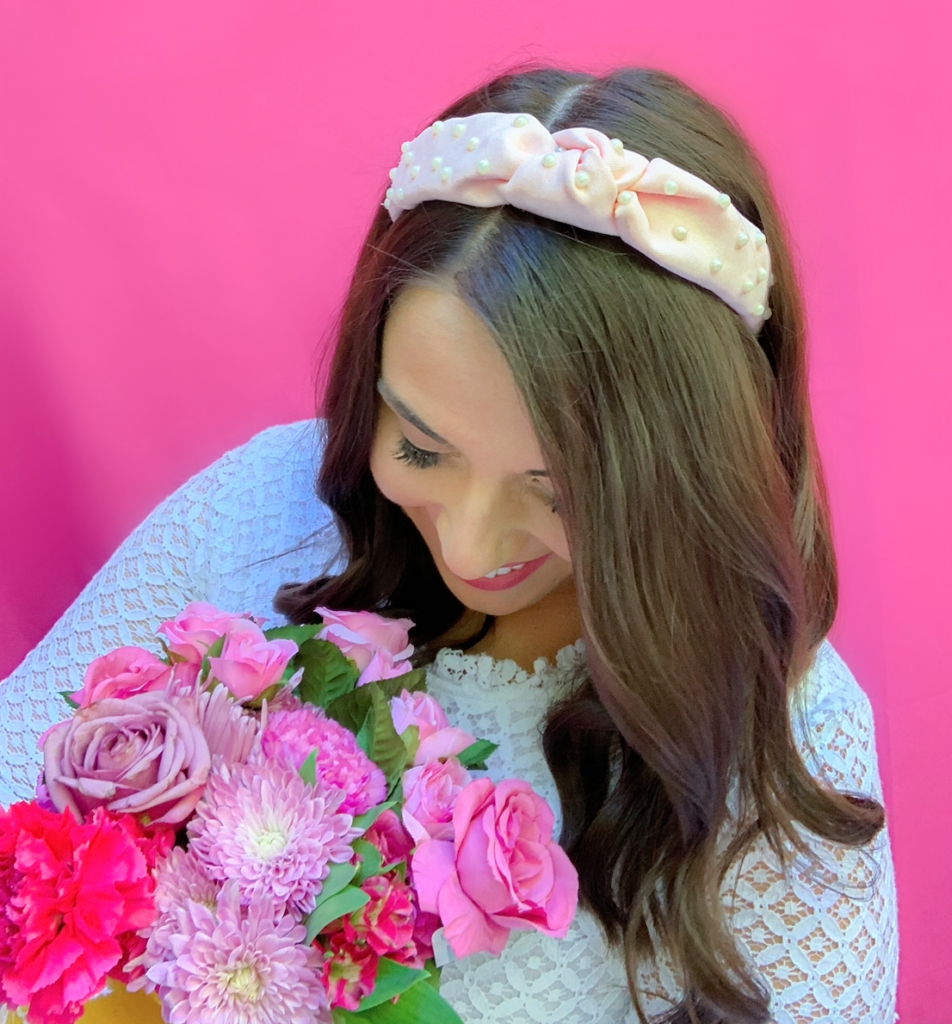
Do you love finding quick and easy hair accessories that don’t require flat irons, a bunch of hair products or a lot of time? Us too and you’ve come to the right place! We’ve partnered with Caroline Bell to bring you this stylish DIY pearl knotted headband tutorial that you can make yourself right at home. This headband is the perfect way to add some glam to a dull hair day and a pop of color to any outfit. Grab some Beacon Fabri-Tac and follow along below to learn how to make your own…
Supplies:
Beacon Adhesives Fabri-Tac
Blush Pink Fabric Napkin – 20″ x 20″
Satin Plastic Headband – 1″ in width
Pearl Stick Gems
Scissors
Instructions:
Step 1: Use scissors to trim napkin size to 6″ in height and 20″ in width.
Step 2: Apply Fabri-Tac along the 20″ napkin edge.
Step 3: Fold over the napkin in half vertically; napkin should now be 3″ in height and 20″ wide.
Step 4: Tie the napkin in a knot; the knot should be in the center leaving even pieces on both ends.
Step 5: Pull headband through the bottom of the knot.
Step 6: Starting at the bottom, fold and attach the fabric edges to the base of the headband and use Fabri-Tac to secure.
Step 7: Form small dots of Fabri-Tac to the fabric headband and place pearl stickers on glue dots to attach pearl stickers to the headband.
Note: When attaching pearl stickers to headband, form dots of glue slightly larger than the pearls.
This headband is super chic and looks great on anyone! Anyone can make this, and if you make your own, be sure to tag us for a chance to be featured on our page. Happy crafting!
Get 20% off Fabri-Tac using code HEADBAND20 at checkout. Offer valid until May 31st at 11:59 PM EST. Exclusions apply.
Follow us on social media:
Instagram | Facebook | YouTube | Pinterest
This DIY was designed and handmade by Caroline Bell.